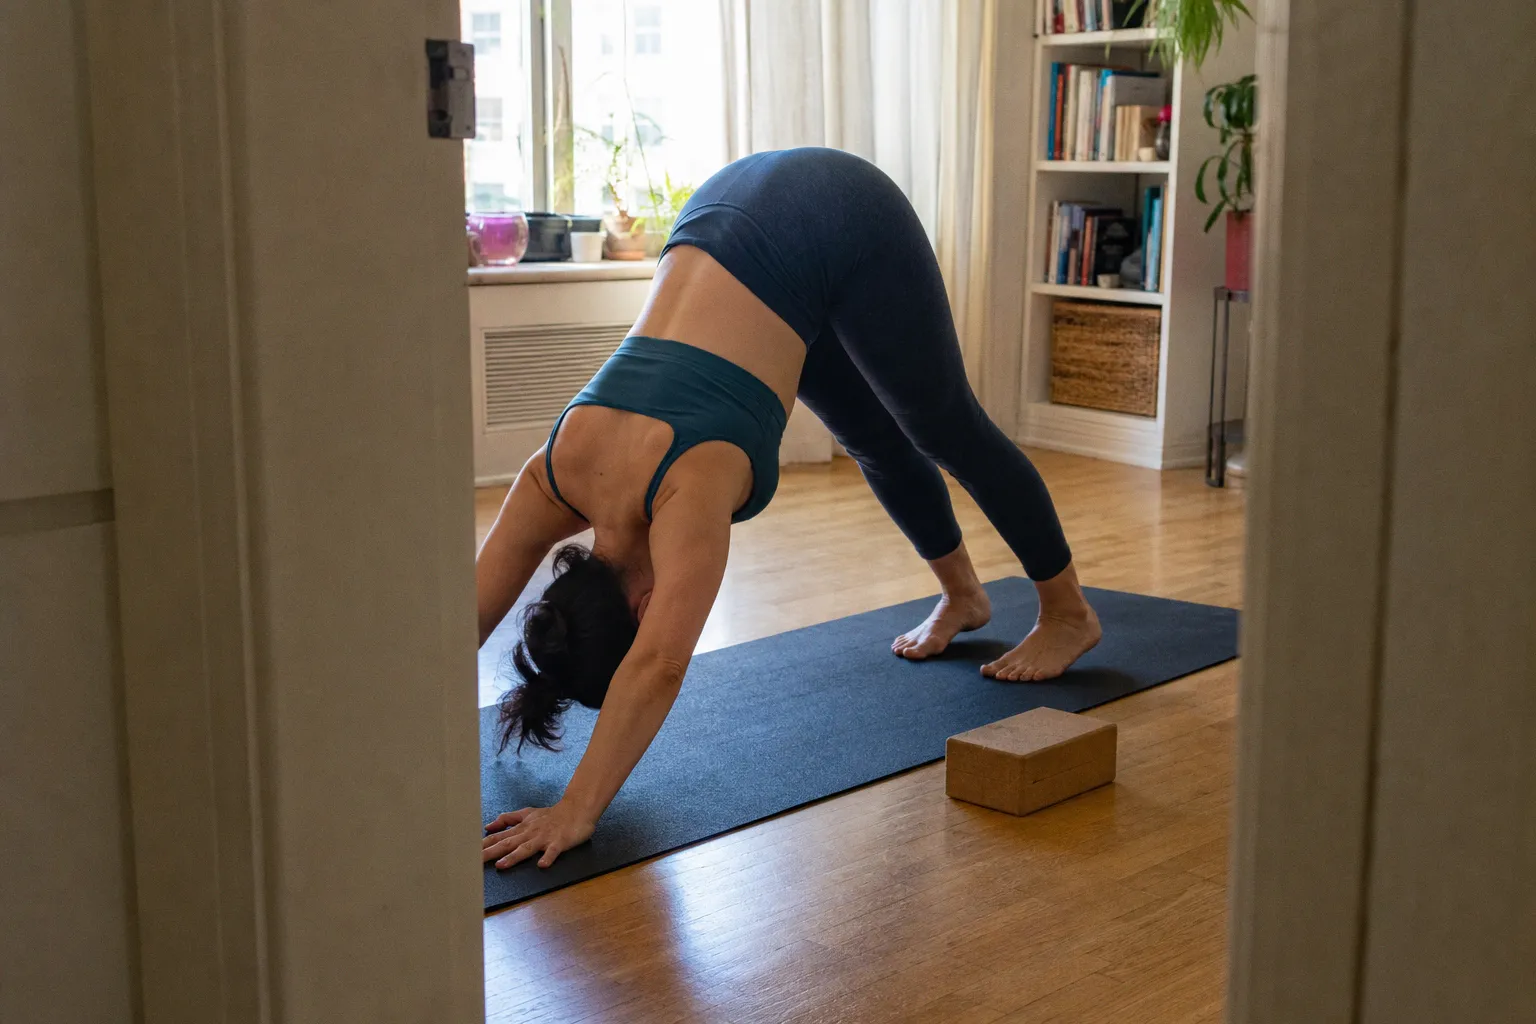
Downward Dog can look simple from the outside: hands down, hips high, heels reaching toward the floor.
But if your wrists start burning thirty seconds in, the pose stops feeling like a spacious full-body stretch and starts feeling like a very small, very angry negotiation with the base of your palms.
That wrist ache is often not a wrist problem alone. In many home yoga practices, the wrists are just the final place where the whole kinetic chain tells the truth: hands not gripping, shoulders collapsing, ribs sinking, hamstrings tugging the pelvis under, and body weight pouring forward like water into the heels of the hands. So when we ask how to check correcting my downward dog alignment to stop wrist pain, we are really asking how to make the entire pose share the load again.
The mechanics of weight distribution: why your wrists take the hit
In a standard Downward Dog, the wrist is usually close to 90 degrees of extension. That is a big ask for a small joint, especially if you spend much of the day typing, gripping a phone, driving, or moving through workouts where the wrists are rarely loaded in that exact angle.
But the angle itself is not the whole story. Many people can tolerate wrist extension when the load is spread through the palm, fingers, forearms, shoulders, trunk, pelvis, and legs. The trouble begins when the hand becomes passive and the shoulders drift forward, so the heavy line of the body stacks almost directly into the heel of the palm.
That “dumping” sensation is specific. You may feel a compressed, hot pressure at the base of the thumb or the outer wrist. The finger pads may feel light, almost decorative. Your knuckles might lift. Your shoulders may creep toward your ears, and the upper back may round without support. From the outside, the pose still looks like Downward Dog. From the inside, your wrists are doing the job of your entire back body.
A useful first check is brutally simple: look at your hands without judging them.
In Downward Dog, notice:
- Are the bases of your palms taking almost all the pressure?
- Are your fingertips pale and inactive, or are they pressing down with intention?
- Are the knuckles at the base of the fingers lifting away from the mat?
- Do your shoulders feel bunched near your neck?
- Do your hips feel as though they are being pulled forward rather than back?
If the answer is yes to several of these, your wrists are probably not “weak” in the dramatic way people sometimes say. They are under-supported. The fascia of the palm, the forearm muscles, the shoulder girdle, the rib cage, and the posterior chain are not yet communicating cleanly enough to distribute force.
Wrist pain in Downward Dog is often a load-sharing problem, not a character flaw or a signal that your body is bad at yoga.
This matters because the fix is not to grit your teeth and hold longer. We do not need heroic suffering in a home mobility routine. We need a better map.
Mastering the “L” grip: the hand is not a flat object
The hand in Downward Dog should not lie on the floor like a pancake. It should behave more like a living suction cup with intelligent edges: broad through the palm, rooted through the finger pads, and active through the thumb-index line.
One of the most reliable cues is to press firmly through the “L” shape formed by the thumb and index finger. That L-shaped base helps wake up the forearm muscles and keeps pressure from collapsing into the wrist crease. When the thumb mound and index knuckle participate, the load travels through more tissue, and the wrist has a better chance to feel spacious rather than jammed.
Here is a slow way to build it before you even lift into the full pose.
1. Start on hands and knees, not in Downward Dog.
Place your hands shoulder-width apart. Spread your fingers naturally wide, not so aggressively that the webbing feels strained. Let the middle fingers point forward or slightly outward if that feels more anatomically honest for your wrists.
2. Root the thumb-index “L.”
Press through the base of the index finger and the inner thumb mound. Feel how the inside line of the forearm subtly wakes up. This is not a clawing tension; it is a steady, elastic contact.
3. Keep the finger pads alive.
Press the pads of all ten fingers into the mat, especially the index finger and thumb, while keeping the heel of the palm grounded. You are not trying to lift the palm completely. You are trying to stop the wrist from becoming the only foundation.
4. Notice the wrist crease.
The crease should feel long and breathable, not crushed. If you feel sharpness, pinching, tingling, or shooting sensation, back out. That is not the kind of information we train through.
5. Then lift the knees and send the hips back.
Carry the same hand action into Downward Dog. If the fingers switch off the moment your hips rise, lower down and repeat. The nervous system often needs a few rounds to understand the new job.
A helpful sensation: imagine the mat is slightly too big and you are gently trying to gather it toward the center of your palm without actually dragging your hands. That will engage the fingers and forearms without hardening the neck.
The difference can be immediate. When the hands become active, the forearms often feel more awake, the shoulders become less crowded, and the wrists stop receiving the whole body like a dropped suitcase.
Hand placement: small changes, big consequences
Hand distance matters. Shoulder-width is usually the best starting point for optimal alignment. If the hands are too narrow, the shoulders have less room to externally rotate and the neck often gets squeezed. If the hands are too wide, the chest may collapse and the wrists can torque outward.
Also look at your mat relationship. Many home practitioners place their hands too close to their feet because they are trying to make the pose look compact or get the heels down. That shortens the line and pushes weight forward. A slightly longer stance often gives the pelvis more space to travel back, which takes pressure off the wrists.
A quick comparison helps:
| Alignment detail | More wrist pressure | Better load sharing |
|---|---|---|
| Palm contact | Heavy in heel of hand, light fingers | Even palm contact with active finger pads |
| Thumb-index line | Passive or lifted | Pressed firmly into the mat |
| Hand width | Too narrow or too wide | Roughly shoulder-width |
| Stance length | Too short, shoulders forward | Long enough for hips to move back |
| Wrist sensation | Compressed, hot, sharp, or pinched | Loaded but broad, steady, and tolerable |
The goal is not to make your hands perfect. The goal is to give your wrists colleagues.
Shoulder girdle mechanics: using external rotation to unload the wrists
If the hands are the foundation, the shoulders are the suspension system. When the shoulder girdle collapses, the wrists feel it quickly.
In Downward Dog, we want the upper arms to externally rotate — a simple way to feel this is to rotate the biceps slightly forward while keeping the hands planted. This action helps stabilize the shoulder girdle, broadens the upper back, and reduces the tendency to sink into the shoulder joints. When the shoulders stop collapsing toward the ears, less pressure pours into the wrists.
This is where the pose becomes more anatomical than aesthetic. Many people hear “push the floor away” and respond by locking the elbows, hardening the ribs, and shoving the chest toward the thighs. That may create a dramatic shape, but it can also jam the wrists and shoulders. Instead, we want a layered action: hands root, forearms engage, upper arms rotate, shoulder blades glide along the rib cage, and the spine lengthens back toward the pelvis.
Try this:
- Set up on hands and knees with your hands shoulder-width apart.
- Press through the thumb-index L and finger pads.
- Without moving your hands, gently turn your upper arms so the biceps face a little more forward.
- Keep the elbows from hyperextending; let them feel long but not locked.
- Broaden across the collarbones without dropping the chest heavily toward the floor.
- Lift into Downward Dog and keep the neck soft between the arms.
You may feel the outer upper arms engage. You may also feel the lower ribs draw in slightly, as though the front body is supporting the back body. That is good news. We are moving away from a passive hang and toward an organized, articulate shape.
One caution: external rotation is not the same as rolling onto the outer edges of the hands. Keep the inner hand — that thumb-index L — rooted. This is the subtle conversation that makes the pose useful: the hands press down and slightly inward; the upper arms rotate outward; the shoulder blades stay wide and responsive.
The shoulder cue that protects the wrist is not “jam harder.” It is “rotate, broaden, and let the whole arm become part of the floor.”
For those of us practicing at home, this level of detail is the difference between repeating discomfort three times a week and actually changing it. It is similar to reviewing any long-term habit with clear eyes, whether we are assessing training volume, recovery, or even the way people study personal investing and wealth building before making decisions: the small inputs matter because they compound.
The role of hamstring flexibility in shifting your center of gravity
Here is the part many people miss: tight hamstrings and calves can create wrist pain.
That may sound indirect, but the body is beautifully inconvenient that way. If the hamstrings are pulling the sitting bones downward and the calves are resisting heel movement, the pelvis may tuck under instead of tipping forward. When the pelvis cannot lift and hinge cleanly, your weight drifts forward into the hands. The wrists become the emergency brake for a posterior chain that does not yet have enough length or give.
This is why forcing straight legs in Downward Dog can be such a trap. Straight legs may look like the “full” pose, but if they drag the pelvis under and shove your shoulders past your wrists, they are not serving the alignment. They are stealing space from it.
Bend your knees. More than you think.
With the knees bent, you can send the sitting bones higher and farther back. The spine can lengthen. The ribs can soften away from a flared position. The hands can stay active without being crushed. For many bodies, this one adjustment immediately changes the wrist sensation because it shifts the center of gravity back toward the legs.
A practical home test:
1. Come into your usual Downward Dog and notice your wrists on a scale from 1 to 10.
2. Bend both knees generously, even if the heels lift.
3. Tilt the pelvis as if you are aiming the sitting bones toward the upper back corner of the room.
4. Press the hands actively into the mat, especially the thumb-index line.
5. Move your chest slightly back toward your thighs, but do not collapse the shoulders.
6. Recheck the wrists.
If the pain drops, your wrists were receiving pressure that your hips and legs could not yet absorb. That does not mean your hamstrings are “bad” or that you must spend months stretching before doing yoga. It simply tells us where to create options.
The calf-hamstring-fascia line
The back body is not a set of isolated parts; it is a continuous sheet of relationship. The plantar fascia under the foot, the Achilles tendon, the calves, the hamstrings, the sacral tissues, and the spinal fascia all influence how easily the pelvis can move in Downward Dog. When that line is dense or guarded, the body often finds range somewhere else.
Sometimes it finds it in the wrists.
That is why pairing Downward Dog work with simple mobility can help:
- Bent-knee calf pulses at the wall: Keep the heel down and gently bend the knee forward to feel the lower calf and Achilles area.
- Half-split hamstring rocks: From a kneeling lunge, shift the hips back and forward with the front leg long but not locked.
- Active hamstring flossing: Lying on your back, hold behind one thigh and slowly extend and bend the knee without yanking the leg.
- Foot rolling with a soft ball: Gentle pressure under the arch can help the plantar fascia feel more responsive before practice.
None of these need to be dramatic. We are not trying to melt ourselves into a new person in eight minutes. We are giving the nervous system more places to distribute movement.
Strategic modifications: blocks, wall support, and smarter angles
If your wrist discomfort persists, changing the angle is not cheating. It is biomechanics.
The standard floor version of Downward Dog asks for a lot of wrist extension. Blocks under the hands can reduce that angle and make the pose more tolerable. A wall version reduces the load even more, which is especially useful if you are returning after irritation, building wrist capacity, or practicing during a week when your hands and forearms are already tired from work.
Here are the main options.
| Modification | What it changes | Best for |
|---|---|---|
| Hands on yoga blocks | Reduces wrist extension and slightly elevates the floor | Mild wrist compression, limited wrist mobility |
| Wedge under palms | Decreases the angle at the wrist crease | People who feel pinching at end-range extension |
| Downward Dog at the wall | Greatly reduces body weight through hands | Sharp sensitivity, beginners, recovery days |
| Forearm Dolphin variation | Removes wrist extension but increases shoulder demand | Wrist relief when shoulders tolerate load well |
| Bent-knee Downward Dog | Shifts weight back and frees the pelvis | Tight hamstrings/calves driving weight forward |
For the wall version, place your hands on the wall at about hip to chest height, shoulder-width apart. Walk your feet back until your torso forms a long diagonal or an L shape, depending on what feels available. Press through the thumb-index line just as you would on the floor. Rotate the upper arms externally. Send the hips back. Let the spine lengthen.
You will still practice the essence of Downward Dog: hand activation, shoulder organization, spinal length, hip hinge, and posterior-chain openness. You simply remove some of the load so the wrists can learn without bracing.
Blocks are another excellent middle ground. Place two sturdy blocks at the front of the mat on their lowest or medium height, depending on your wrists and shoulder mobility. Put your hands on the blocks with the fingers wrapping slightly over the front edge if that feels secure. Then lift into Downward Dog and observe whether the wrist crease feels less compressed.
A small warning: blocks must be stable. If they wobble, your hands may grip defensively, and the shoulders may tense. Use a non-slip mat and choose a height that feels grounded rather than precarious.
How to check your alignment during a home practice
Because most of us do not have a teacher adjusting our Downward Dog in the living room, we need reliable internal and external checkpoints. This is where “how to check correcting my downward dog alignment to stop wrist home” becomes very practical: we need a method that works between the sofa and the coffee table, not just in a studio with mirrors and perfect lighting.
Use a short video if you can. Set your phone to the side, not in front. Film three breaths in Downward Dog. Then look for the relationship between wrists, shoulders, spine, pelvis, and legs.
You are not looking for a magazine shape. You are looking for load.
Check these details:
- Wrists: Are the shoulders clearly forward of the wrists, or are the hips drawing back enough to create a diagonal line of force?
- Hands: Can you see the index knuckles and finger pads pressing, or do the fingers look lifted and slack?
- Elbows: Are they locked and rolling inward, or long with the upper arms externally rotating?
- Shoulders: Are they jammed near the ears, or is there space around the neck?
- Spine: Is the back rounding because the legs are too straight, or can the spine lengthen when the knees bend?
- Pelvis: Are the sitting bones reaching up and back, or is the pelvis tucked under?
- Breath: Can you breathe steadily, or does the pose create a bracing, breath-held feeling?
The breath is not mystical here; it is mechanical feedback. If you cannot breathe, the rib cage is probably not moving well, the shoulders may be overworking, and the nervous system may be treating the pose as a threat rather than a supported shape.
A three-breath reset for wrist-friendly Downward Dog
Use this sequence inside your regular yoga at home routine, especially before a vinyasa flow or bodyweight session where planks and push-up positions will also load the wrists.
1. Breath one: build the hands.
Press the thumb-index L down. Spread the finger pads. Feel the forearms wake up.
2. Breath two: organize the shoulders.
Rotate the biceps slightly forward. Broaden through the upper back. Let the neck soften.
3. Breath three: move the pelvis back.
Bend the knees, lift the sitting bones, and shift weight toward the legs without losing the active hands.
Then decide: stay, modify, or come down.
That decision is part of good training. If the wrists feel broad and loaded but not painful, continue for a few more breaths. If the sensation becomes sharp, nervy, or increasingly compressed, choose blocks, the wall, or rest. Pain is information, not a dare.
When wrist discomfort needs more than alignment
Most Downward Dog wrist discomfort is related to technique, load, mobility limits, or a sudden increase in practice volume. But not every wrist sensation belongs in a yoga adjustment article.
If you feel numbness, tingling, shooting pain, swelling, lingering pain after practice, or symptoms connected to a known condition such as carpal tunnel syndrome, it is wise to speak with a qualified clinician. Yoga alignment can reduce unnecessary strain, but it is not a cure-all for chronic medical conditions, and your wrists deserve more precise care if they are sending persistent signals.
Also consider your total weekly wrist load. Home fitness often layers stress without us noticing: push-ups on Monday, planks in a HIIT workout on Tuesday, laptop hours every day, then a yoga flow with repeated Downward Dogs. The tissues of the wrist and forearm adapt well, but they need progression. Fascia, tendons, and joint capsules respond to gradual exposure, not surprise marathons.
A gentler weekly rhythm might include:
- Floor Downward Dog on days when the wrists feel fresh.
- Blocks or wall variations during recovery workouts.
- Forearm-based mobility when the hands need a break.
- Short wrist preparation before yoga: circles, palm pulses, fingertip loading, and gentle forearm stretching.
- More bent-knee Downward Dogs during hamstring-heavy weeks.
This is not being cautious in a fearful way. It is being precise.
The final adjustment: make the pose feel distributed
A wrist-friendly Downward Dog is not created by one magic cue. It is built by distribution.
The fingers press so the palm does not collapse. The thumb-index L roots so the forearms engage. The upper arms externally rotate so the shoulders stop crowding the neck. The knees bend so the pelvis can tip and travel back. The calves and hamstrings gradually learn to give without stealing space from the wrists. The whole kinetic chain participates.
That is the quiet win: the pose stops being a punishment for your wrists and becomes a conversation across the entire back body.
For your next practice, do not overhaul everything. Choose one daily integration point. Before your first Downward Dog, spend ten seconds on hands and knees building the thumb-index L, then lift your hips with bent knees and take three slow breaths. If your wrists feel better, you have your starting place. If they still complain, elevate your hands or move to the wall.
We are not chasing the flattest heels or the prettiest triangle. We are teaching the body to share load with more intelligence, more patience, and far less unnecessary tension.