Most home trainees skip horizontal pulling. Dumbbells are expensive. Pull-up bars need a sturdy doorframe and proper mounting hardware. Bodyweight rows from a kitchen table require furniture that wasn't engineered for that load.
Resistance bands solve the anchor problem in under a minute. A single closed-loop band, a solid interior door, and one accessory called a door anchor turn any standard doorframe into a functional row station. The variable resistance profile of elastic tubing also delivers peak-contraction tension that free weights cannot match at lockout. This guide covers the mechanics, the setup, and the progression model for building a stronger back with bands only.
Bands do not replace a barbell. They replace the excuse for not training the back at home.
The Mechanics of Constant Tension in Back Training
Free weights operate on gravity. The tension curve follows the lever arm — heaviest at mid-range, weakest at lockout. Bands operate on elastic stretch. Tension rises as the band elongates, peaking precisely at the contracted position where the lats, rhomboids, and mid-trapezius are shortened and mechanically disadvantaged.
This shift in the tension curve has two consequences:
- Peak contraction overload. The end range of a banded row or pulldown delivers 100% of available tension. The same position in a free-weight row delivers a fraction of peak load. For hypertrophy, where mechanical tension is the primary driver, the band wins at the finish line.
- Reduced joint shear. No momentum. No jerking. No kipping the weight up. The band resists across the entire range of motion, including the eccentric, which is where most back strains occur in recreational lifters.
| Tension Profile | Free Weight | Resistance Band |
|---|---|---|
| Start of rep | High | Low |
| Mid-range | Peak | Rising |
| Lockout / peak contraction | Reduced | 100% peak tension |
| Eccentric control | Variable | Continuous |
The trade-off: bands cannot deliver absolute peak loads comparable to a heavy barbell row. The 1-rep-max ceiling is lower. For a home trainee without a gym, that ceiling is irrelevant. The real question is whether you can drive the muscles into the 8-15 rep hypertrophy range with proper tension. The answer is yes.
Setting Up Your Fast Anchor Hack for Horizontal Pulls
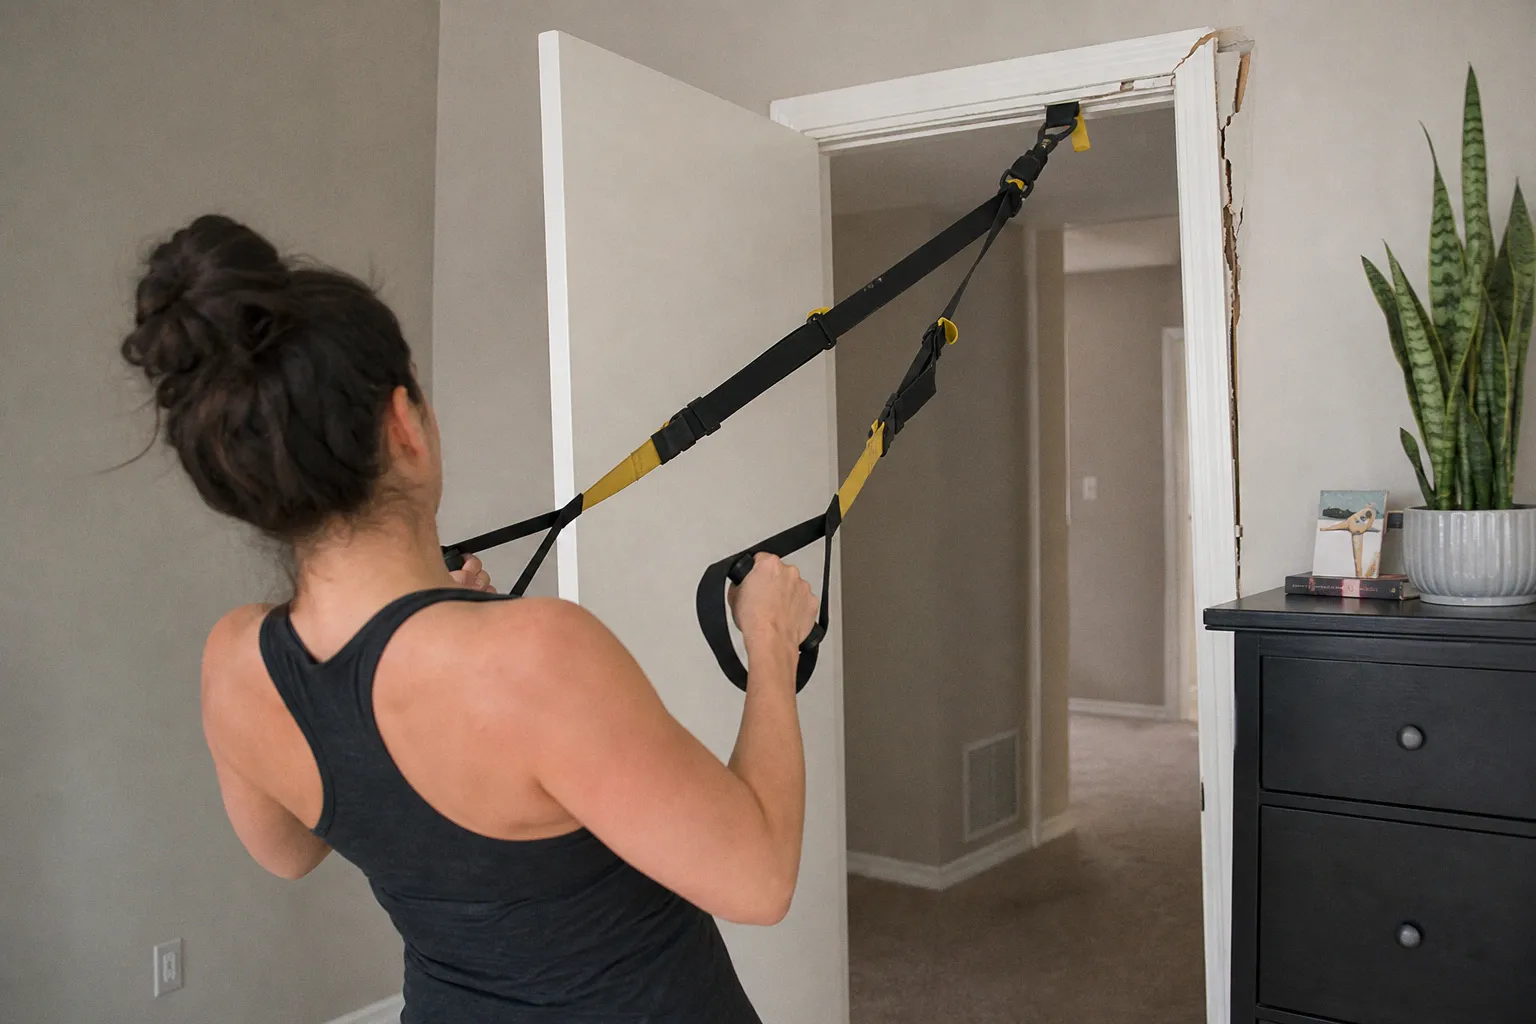
The door anchor is the fastest legal hack. It is a foam-padded block with a fabric loop, designed to wedge into the top edge of a closed door. Once the door shuts, the anchor locks in place against the doorjamb. No drilling. No hardware. Setup time: under 60 seconds.
Step-by-step setup:
1. Take a closed-loop resistance band. Loop-style bands (the rubber fitness circle kind) work best.
2. Thread the band through the fabric loop of the door anchor.
3. Place the anchor over the top of a solid-core door. Not hollow-core. Hollow doors can crack under tension.
4. Close the door firmly. The door frame holds the anchor against the door stop.
5. Test the anchor with half your working tension. If the door shifts, the anchor is unsafe. Move to a heavier door or a different setup.
Anchor placement options:
- Top of door: Best for overhead pull-down variations.
- Side of door (mid-height): Best for low rows and chest press variations.
Safety rules:
- Do not anchor to door handles that do not lock. The force pops the handle open mid-rep.
- Do not anchor to lamps, chairs, or anything with a center of gravity above the floor.
- Do not use a hollow-core door. It will crack.
For trainees without a door anchor, the alternative is a structural post. A stair banister, a squat rack upright, or heavy furniture bolted to the wall will work. The anchor must hold your full body weight plus band tension. If it can tip, it will fail.
Targeting the Lats and Rhomboids with Banded Rows
Three exercises cover roughly 80% of the back musculature: the seated row, the standing row, and the band pull-apart. Each isolates a slightly different region of the posterior chain.
1. Seated Band Row
- Sit on the floor with legs extended, band wrapped around the soles of your feet.
- Pull the band toward the lower abdomen, elbows tight to the torso.
- Squeeze the shoulder blades together at end range.
- Target: Latissimus dorsi, mid-back, biceps brachii (secondary).
2. Standing Band Row (with door anchor)
- Stand 2-3 feet from the door, facing it.
- Grip the band at chest height.
- Pull the elbows back, driving the hands toward the ribcage.
- Target: Rhomboids, mid-trapezius, posterior deltoids.
3. Band Pull-Apart
- Hold the band with both hands, arms extended at shoulder height.
- Pull the band apart, squeezing the shoulder blades together.
- End position looks like a "T" with the arms.
- Target: Posterior deltoids, rhomboids, external rotators.
| Exercise | Primary Muscle | Rep Range | Band Tension (Men) | Band Tension (Women) |
|---|---|---|---|---|
| Seated Row | Lats | 10-15 | Heavy / X-Heavy | Medium / Heavy |
| Standing Row | Rhomboids, Mid-Traps | 12-15 | Medium / Heavy | Light / Medium |
| Band Pull-Apart | Rear Delts, Rotator Cuff | 15-20+ | Light / Medium | Light |
Bands are color-coded by tension, but the color codes are not standardized across manufacturers. Use resistance as the metric, not color. A band that fails at 6 reps is too heavy. A band that fails past 18 is too light. The correct tension produces failure between 8 and 15 reps with strict form.
Strategies for Progressive Overload Without Heavy Weights
Progressive overload is the principle that forces adaptation. With dumbbells, you add 5 lbs per side. With bands, you have four levers:
1. Increase band thickness. Most manufacturers sell 4-5 tension levels, from light to extra-heavy. Step up to the next band when the current band no longer challenges you in the 12-15 rep range.
2. Shorten the band length. The same band stretched further produces proportionally more tension. Step closer to the anchor to reduce tension. Step further to increase it.
3. Increase volume. Add a set. Going from 3 sets to 4 sets of banded rows increases mechanical tension exposure by 33%.
4. Slow the tempo. A 3-second eccentric (lowering phase) increases time under tension without changing the band. A standard hypertrophy tempo is 1-second concentric, 1-second pause, 3-second eccentric.
| Lever | Effort Cost | Time Cost | Equipment Cost |
|---|---|---|---|
| Band thickness | Low | None | New band needed |
| Shorten length | None | None | Free |
| Volume (sets/reps) | Low | +5-10 min | Free |
| Tempo manipulation | None | +2-3 min per set | Free |
The most cost-effective lever is shortening the band length. It costs nothing. The least cost-effective is buying a new band every 6-8 weeks, though it is necessary for long-term progress.
A common mistake: trainees buy one band and call it a year. That single band is a one-dimensional tool. A 4-band set covering light, medium, heavy, and extra-heavy provides a full strength curve. Total cost is a fraction of one month at a budget gym.
Optimizing Rep Ranges and Rest for Muscle Growth
The hypertrophy rep range is 8-15 reps per set. Below 8, you are training neural strength, not muscle size. Above 15, you are training endurance. The band row is a strength-endurance hybrid by nature — tension climbs throughout the set, so reps that start easy end hard.
Rest periods:
- Strength focus: 90-120 seconds between sets.
- Hypertrophy focus: 60-90 seconds between sets.
- Endurance focus: 30-45 seconds between sets.
For a pure back-hypertrophy program, 60-90 seconds is the sweet spot. It allows partial phosphocreatine recovery without fully cooling the working muscles. Metabolic stress stays high.
Sample weekly split:
| Day | Exercise | Sets x Reps | Rest |
|---|---|---|---|
| Mon | Seated Row | 3 x 12 | 75 sec |
| Mon | Standing Row | 3 x 15 | 60 sec |
| Mon | Pull-Apart | 2 x 20 | 45 sec |
| Thu | Seated Row | 4 x 10 | 90 sec |
| Thu | Standing Row | 3 x 12 | 75 sec |
| Thu | Pull-Apart | 2 x 15 | 60 sec |
Two sessions per week is the minimum effective dose for back hypertrophy. Three is better. Four is overkill for most natural lifters.
Progression protocol: Add 1 rep per set every week. When you can complete 3 x 15 of the seated row with strict form, step up to the next band thickness. Drop back to 3 x 10 and rebuild.
The Verdict: Do It, With Caveats
Resistance band back training works. The variable resistance profile is mechanically superior to free weights at peak contraction. The door anchor hack takes under a minute to set up and costs less than a single adjustable dumbbell. The only failure mode is anchoring to something unstable or hollow-core.
Do it if:
- You train at home without a cable machine or barbell.
- You have 15-20 minutes, 2-3 times per week.
- You want to fix rounded shoulders or break through a pull-up plateau.
Skip it if:
- You have access to a gym with a cable column and heavy dumbbells.
- You are training for a max-effort powerlifting meet.
- You cannot secure a solid door or structural post for the anchor.
Bands are not a barbell replacement. They are a barbell substitute for the 90% of trainees who do not have a barbell at home. The 1-rep-max ceiling is lower. The injury risk is lower. The portability is higher. The cost is roughly the price of a single dumbbell.
That is the math. The only variable left is execution.